

Country #9 revealed
I’ve had a stressful couple of weeks, which means a few things: (1) I was sensible enough to constrain myself to one dish this time instead of two or three or four, (2) it took me the full week to find time to make my one dish, and I was still awfully busy for some time afterward, so this post is going up more than a week after the last one (sorry!), and (3) this week’s recipe is not really as “new and different” as I ideally aim for these recipes to be.
Kanelboller, you see, is Norwegian for “cinnamon buns.” I have, obviously, both made and eaten cinnamon buns/cinnamon rolls before, but after a long and stressful week, I was craving comfort food, and, well, it’s hard to beat cinnamon rolls when it comes to comfort food. These ones have a little twist (both literally and figuratively!) that makes them uniquely Nordic, so they still do qualify under my rules. (Also, there’s a non-zero chance that we’ll revisit Norway with a bonus recipe in about a month. You’ll see why when and if that happens!)
Boller – i.e. “buns” – are apparently a staple of Norwegian cuisine. Boller are lightly sweet rolls seasoned with cardamom, and there are plain boller, boller with raisins or other dried fruit in them, boller with chocolate in them, and, of course, boller with cinnamon filling. I seriously considered making each of those varieties, but, as I said, at the end of a stressful week, kanelboller were the ones that sounded most like comfort food, and so kanelboller it would be.
Being swamped and stressed also meant one more thing: I didn’t have a lot of mental energy left for going through a bunch of recipes and fiddling with everything until I had a recipe of my own. Instead, I stuck pretty closely to the recipe on this Norwegian food blog (which has a bunch of excellent sounding recipes, including some for other kinds of boller). I did tweak a few quantities and steps, so my kanelboller aren’t exactly like hers, but they’re pretty similar.
Okay – let’s get things rolling. (Get it, ’cause they’re rolls? Man, I’m so witty.)
THE PROCESS
There aren’t too many ingredients this week, and no particularly unusual or hard-to-find ingredients at all.
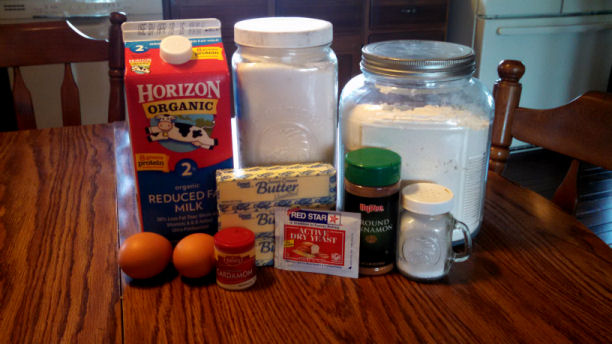
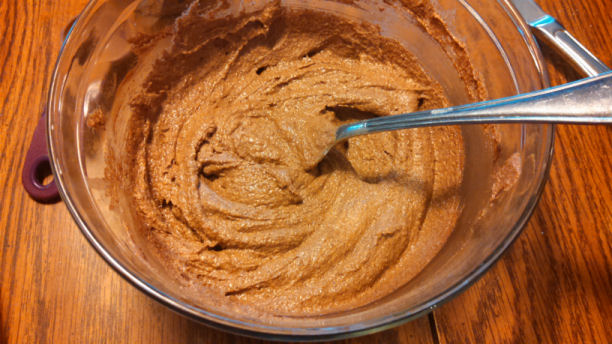
I began by slightly warming half a cup of the milk in the microwave (you don’t want it more than a teensy smidge above room temperature), mixing in a teaspoon of sugar, and activating the yeast in it. The recipe this is largely based on does not suggest activating the yeast before adding it to the mix, and you can skip this step if you want, but I strongly prefer to do it. Every so often you get a dud packet of yeast, and it’s nice to find that out before you mix it into your dough. I mention this because I did, in fact, get a dud packet of yeast this time around – it sat there in the sugary milk and did nothing at all. Luckily, I had a few more packets of yeast in the pantry, and so the second bowl of milk, sugar, and yeast foamed up just fine. While it was getting nice and foamy, I put the flour, sugar, salt, and cardamom in a large mixing bowl, and heated the other two cups of milk to room temperature. After the yeast had had ten minutes to foam up, it went into the mixing bowl as well, along with one egg. I mixed those in and then gradually added the other two cups of milk. Then in went the softened butter, also added gradually. (If you have a good, large stand mixer or something similar, all this mixing would probably be much easier to do that way. I only have a medium-sized, mediocre food processor, and so I did my mixing by hand – and I mean that literally, since after a certain point it’s much it’s much easier to grab the dough and massage butter into it than to try to use a spoon.) Once everything was well-mixed, I formed the dough into a big ball, covered the mixing bowl, and left it to rise for about an hour.
While it was rising, I made my cinnamon filling by mixing together butter, cinnamon, sugar, and salt. (The butter I used was unsalted butter – if you’re using a stick of salted butter here, you should skip adding the additional salt.) I tasted a little of it to see how I liked it. (Okay, I’ll be honest, I tasted a lot, at many points in this process. There’s no real way to make these kanelboller without frequently getting cinnamon-sugar-butter on your hands, and if you can do that without licking your fingers every couple of minutes, you are a stronger person than I am. I had to wash my hands about seventy-three times while I was making these rolls because there kept being more delicious cinnamon filling to lick off them.) After that first taste test, I decided I wanted the filling to have a little more Scandinavian oomph to it, and added some cardamom to it, too.
Filling done, I used up a good-sized chunk of my remaining stick of butter thoroughly greasing several cookie sheets, and then it was time to check on the dough, which had risen nicely to create a giant monster doughball of dooooooooooooooooooom!
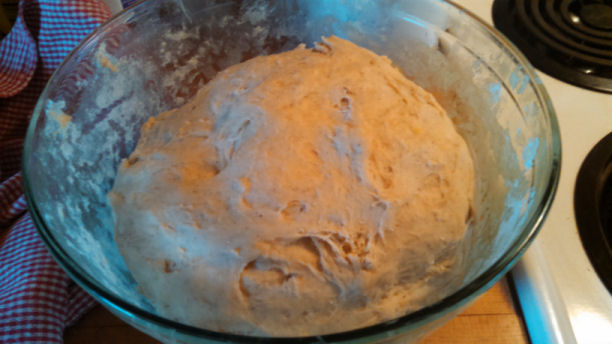
…okay, not so much doom as tastiness. Which is not actually very much like doom. But still! It’s big!
This is probably a good moment to mention that this recipe makes a lot of kanelboller. I believe I ended up with 25 full-sized rolls – and that was after everyone in the house (including me, of course) stole multiple blobs of dough, because lightly sweet, cardamom-flavored dough is super yummy. Since everyone in the house (again, including me) has a major sweet tooth, I wasn’t worried about rolls going to waste (and indeed, they did not), but if you don’t have a lot of people to feed or your household isn’t full of people who will happily eat three cinnamon rolls a day, you might want to halve the recipe.
Anyway, I took my giant monster doughball of doom and/or tastiness and kneaded it for five minutes or so. I then divided it in half, chucked one half back in the bowl, and put the other half on a lightly floured silicone baking mat to roll it out. (I used to use waxed paper for this, but I hate rolling out relatively tough dough like this on waxed paper – it’s always grabbing the paper and crinkling it up instead of rolling out properly. Silicone mats are much nicer, if you’ve got one.) Because this is a relatively tough dough, it took some work to get it to spread out nicely, but eventually the dough got to roughly a quarter-inch in thickness, and I had a rectangle large enough to more than cover the baking mat.
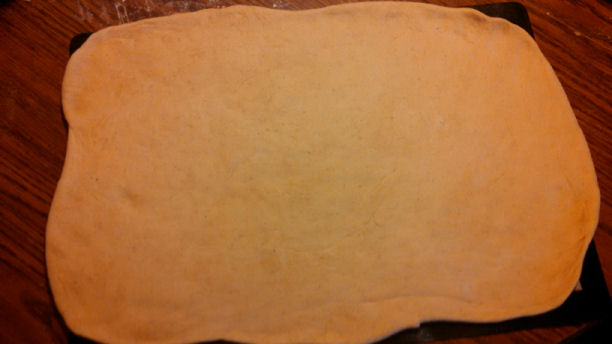
I then took my cinnamon-butter mixture and spread half of it over one half of my big dough rectangle, like so:
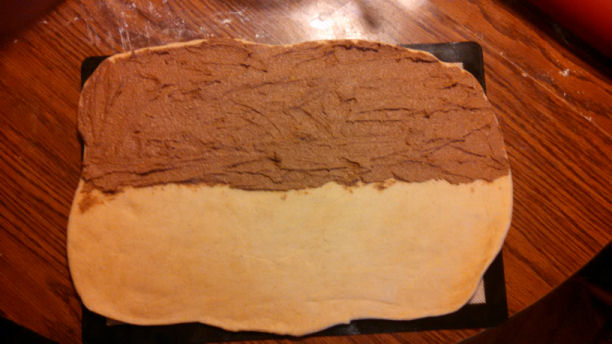
I carefully folded the dough in half, so that I had a long, comparatively thin rectangle of dough with a thick layer of cinnamon filling inside. I stretched and squished the dough until all the edges all lined up fairly well. I then took a knife and sliced the dough rectangle in half crosswise (so that now I had two shorter, squarer rectangles of dough), and then began slicing each of those rectangles into strips lengthwise.
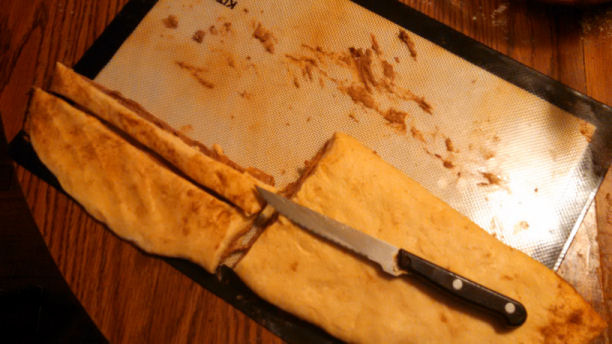
Each strip was about 3/4 of an inch wide. As you can see (thanks to my helpfulness), each one consists of two layers of dough with cinnamon filling in between them.
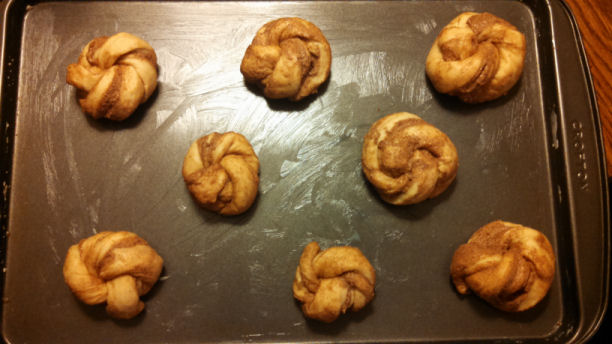
Now it was time to make the kanelboller look all pretty. After I sliced each strip, I twisted it into a spiral, like so:

Then I tied each spiral into a simple knot and tucked the ends in. This may sound slightly complicated, but it’s really knot. (Ba-dum tshhh!) The recipe I linked to earlier in this post includes a YouTube video demonstration, which might be helpful. It’s not at all necessary to do this whole twisting and knotting thing if you’d rather just make a simpler shape, but the twisting and knotting is really very easy and the resulting buns look…well, see for yourself!
I let each tray of kanelboller rise a little more for about fifteen minutes (they didn’t rise very much more, though, so honestly, you could probably skip this if you’re in a hurry), made a simple egg wash by mixing together one egg and two teaspoons of milk, and then brushed a little of that over each roll so that they looked nice and shiny.
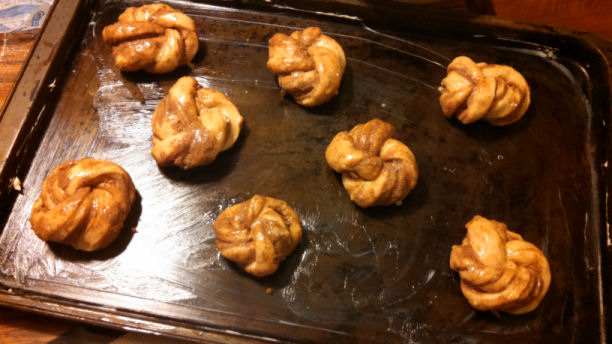
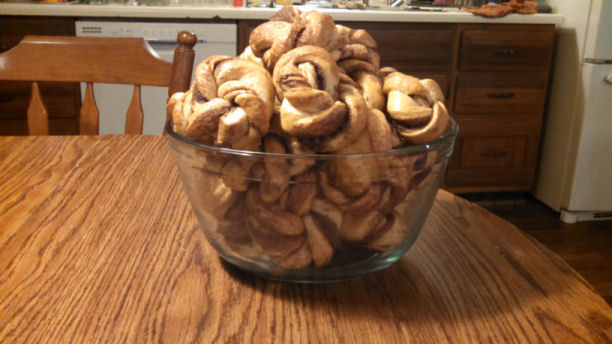
Then they went into the oven at 390° F to bake for about 13-14 minutes. While the first cookie sheets of cinnamon rolls were baking, I went back and got the other half of my doughball (of doooooooooooom) and repeated the whole process of rolling, coating, folding, slicing, twisting, knotting, and egg-washing with it. Then I baked those rolls, too, until finally, I had kanelboller…

…lots and lots of kanelboller.
THE VERDICT
I mean, they’re made-from-scratch cinnamon rolls – what do you think the verdict is?
But seriously, these are delicious. The cardamom does give them a slightly more complex (and yummy!) flavor than plain cinnamon rolls, and while I’m obviously a bit biased, I think they look gorgeous, too. (Also, because I was rather proud of this: one of my family members brought some kanelboller to work to distribute among their coworkers, and apparently one of the reviews they received was “if delicious is 10, this is a 20.” So, yeah…they’re pretty tasty!) As I said at the beginning, they are obviously not quite as new and different as I ideally aim for with this project, but as comfort food, they were utterly successful. And hey, I didn’t injure myself in any stupid ways this week, so that endears me to the kanelboller in and of itself.
If I make these again – which I probably will, because they’re really not that complicated and they end up tasting and looking pretty darn impressive – I honestly don’t think I’d change much of anything. Perhaps I’d make even more filling so that the cinnamon-sugar swirls were bigger and the rolls were even less healthy, but that’s about it.
THE INGREDIENTS
For the dough:
8 cups flour
2/3 cup sugar
4 tsp cardamom
1 tsp salt
1 package yeast
2 1/2 cups milk
2/3 cup butter, softened (11 1/3 tbsp, or just under 1 1/2 sticks), plus more to grease the cookie sheets
For the filling:
1 stick (1/2 cup) butter, softened
1/2 cup sugar
4 1/2 tbsp cinnamon
1 tsp cardamom
For the egg wash:
1 egg
2 tsp milk
Because I took something in the vicinity of eleventy billion years actually getting this post up, the next country will be revealed roughly one minute after I hit “publish” on this. Stay tuned!

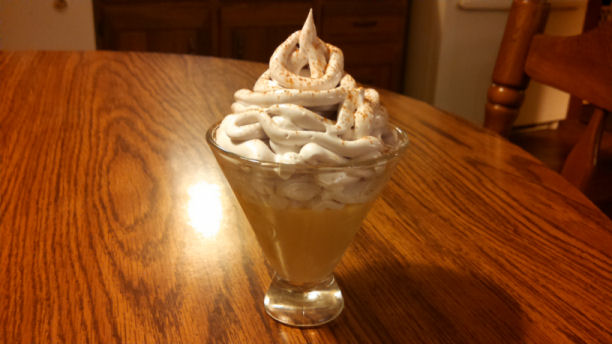
While I made the suspiro de limeña second, it was the dish I decided on first – partly because it sounded yummy, but honestly, mostly because of its name. “Suspiro de limeña” literally translates as “the sigh of a woman from Lima,” and was apparently so named by a Peruvian poet because “like the sigh of a woman, it is soft and sweet.” I find it endearingly amusing when some detail of a region’s culture conforms ridiculously well with silly stereotypes about that culture, and, well, I’m pretty sure if I had asked people to guess what area of the world would have a popular dessert with a name origin like that, Latin America would have topped most people’s lists. (“Papas rellenas” is also a slightly amusing name, provided you’re childish enough to think it’s kind of funny that one of the Spanish words for “potato” is also the Spanish word for “pope.” Which, to be fair, I am. Hee hee, I made stuffed popes! But still, I think “suspiro de limeña” has them beat in the entertaining names contest.)
“Soft and sweet” is certainly an accurate description of suspiro de limeña – especially the “sweet” part, since it is essentially caramel covered in meringue – but Peru has its own twists on both of those components, especially the meringue. See for yourself!
THE PROCESS
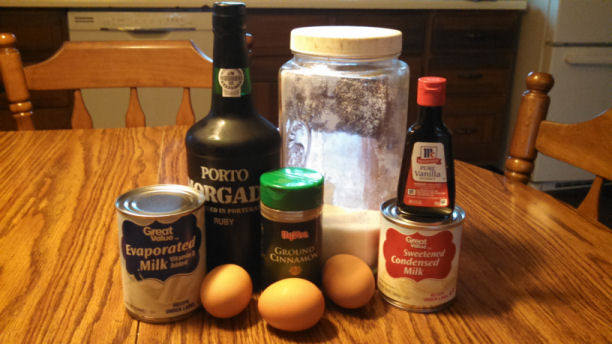
While making suspiro de limeña takes a little time and effort, it doesn’t take a whole lot of ingredients:
First up was making the bottom layer of the suspiro de limeña – what Peruvians call manjar blanco. (It’s very similar to dulce de leche, so if you already have a good dulce de leche recipe, or want to buy it pre-made, you could use it in this recipe instead.) So I poured the sweetened condensed milk and the evaporated milk into a saucepan, put it over medium-low heat (about a 4 on my 1-10 scaled stove), and stirred.
And stirred.
And stirred.
Any time you’re making something pudding-y, it tends to involve long periods of constant stirring, which is why I don’t make pudding very often. I am not the most patient person. But by gum, I’d made up my mind that I was making this dessert, so I kept up a nice, constant, slow stir with my right hand for something like an hour and twenty minutes while accomplishing very important tasks with my left hand.

After eighty minutes of stirring and impressing strangers around the world with my excessive knowledge of Tolkien, Pratchett, and Broadway minutia, the milk mixture was thick enough and lightly browned enough for me to move on to the next step. I removed it from the heat temporarily while I separated my three eggs.
Incidentally, I am a weirdo who really enjoys separating eggs. It’s strange, because I’m generally a fairly jittery and uncoordinated sort of person who really ought to be bad at egg-separation, but for whatever reason, gently tipping a yolk back and forth between eggshells is one of the few situations in life where I somehow manage to be all relaxed and smooth and competent. Perhaps I need to start carrying eggs around with me everywhere and start separating them whenever I get stressed. I bet that would make job interviews much easier, except for the part where the interviewer would be deeply confused as to why I was meditatively pouring egg white onto his or her desk. Oh, well – it was almost a good idea.
Anyway, once the eggs were separated, I poured a little of the hot milk mixture into the bowl with the yolks, whisked that together, and then poured it all back into the main portion of the mixture, along with the vanilla. Then the pan went back onto the heat for just a couple of minutes more (while I continued stirring constantly). Once the eggs and vanilla were thoroughly mixed in and the mixture was warm enough that the yolks were most likely safe to eat, I distributed the manjar blanco as evenly as I could among six small glasses. (Martini glasses are ideal for this, but I only own two martini glasses, so I put the other four portions in little dessert-cup thingies.) The manjar should roughly half-fill each container.

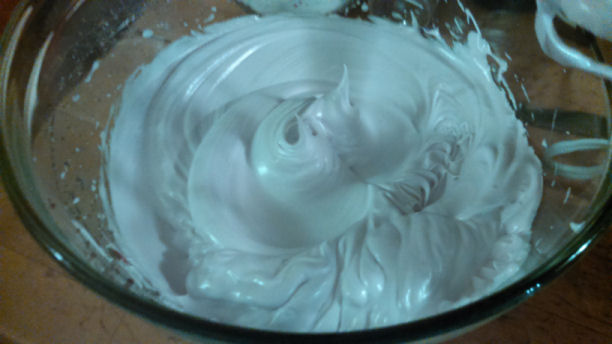
I stuck my six little optimist-or-pessimist tests in the fridge and moved on to the meringue. Now that the whites had had a little time sitting out and getting to room temperature, I poured them into a large mixing bowl, and then realized that I hadn’t put any cream of tartar in my photograph at the beginning. Now, you can totally make meringue without any cream of tartar, but I do like it in there (it makes it fluffier, in my experience), so I decided I’d go ahead and have yet another ingredient picture where one ingredient had wandered off. Once I’d added my cream of tartar, I used an electric egg beater on high to whip the egg whites until soft peaks formed. (“Soft peaks,” for those of you who don’t do the meringue thing often, means that when you pull the beaters out of the meringue, it forms points which droop over. “Stiff peaks” means it forms points that stay upright.)
It was now time to prepare the “twist” on the meringue that I mentioned earlier. In a small pan, I mixed together the sugar and the port wine. (While all the suspiro de limeña recipes I read specifically called for port, you could almost certainly substitute any reasonably sweet, full-flavored red wine here. If I hadn’t found a very cheap bottle of port at Trader Joe’s, I almost certainly would have made such a substitution, because port can be on the pricey side.) I heated that up over medium-low heat, stirring just until the sugar was mostly dissolved, and then let it simmer for another five minutes or so. (Be careful not to overcook this – you’re just trying to turn it into a syrup, not cook away any of the sweetness.)
Once it had simmered enough to turn properly syrupy, I removed the wine syrup from the heat. At this point, I apparently decided that all my coordinated smoothness while separating eggs needed to be counterbalanced by being a complete imbecile.
So, you may remember that two weeks ago, I splashed myself with hot oil while frying Moldovan plăcintăs, and last week, I grated the skin off my finger while preparing Seychellois Creole rice. You may also remember that I joked after the latter injury that, at this rate, I’d probably better be pretty careful this week if I didn’t want to injure myself even more severely and even more idiotically.
Yeah, so, when I pulled the spoon that had been sitting in boiling wine syrup for the last several minutes out of the pan, it started to drip everywhere. I didn’t have a good place to put it down, so in an effort to get it to stop dripping enough that I could carry it to the sink, I decided to blow on it a little bit to help the syrup congeal. I held the spoon in front of my face in order to do so, and then somehow (I still can’t figure out how) managed to fumble my grip on it just enough to bonk the edge of it against my mouth. That would, again, be the spoon that had been submerged in boiling liquid up until a few seconds earlier.
Ow.
So, yeah, I’m now missing a few layers of skin off the middle of my lip. It’s super attractive. I’ve spent the last few days drinking through straws because anything at all acidic touching my lip smarts like the dickens. On the bright side, the suspiro de limeña itself is not at all acidic, so I’m able to eat it just fine! (And my burnt lip already looks and feels quite a bit better today than it did a couple of days ago, so that’s good. There’s still a very obvious burnt patch that keeps getting all scabby and itchy, but it’s both less conspicuous and much less painful than it was at first.)
Anyway, once I was done with my weekly adventure in Injuring Myself in Staggeringly Stupid Ways (I’m barely joking when I say that next week I think I’ll be looking for recipes that involve no heat or sharp implements at all, because apparently I can’t be trusted with those things), it was time to fold the hot wine syrup into my beaten egg whites. I dribbled it in a little at a time (while trying to balance an ice pack on my face, because, again, I am an idiot), beating well after each addition.

You might think that you’d end up with pink meringue, but you really don’t – the final result is just very, very faintly pink-tinged. Once I’d added all the wine syrup, I kept beating until the meringue was nice and glossy and formed stiff peaks.
Now, at this point, I could have just scooped the meringue in big dollops onto the glasses of manjar blanco, but I felt like being fancier than that, because – as you already know – I’m in the fast lane from LA to Tokyo. (Assuming, that is, that being in the fast lane from LA to Tokyo mostly involves sitting around a house in the Midwest in my pajamas. Fancy!) So instead, I scooped some of those big dollops into a large Ziploc bag, sealed it shut, snipped off a corner using a pair of scissors, and topped each glass with a crazy mass of meringue curlicues. Then I topped those crazy masses with a delicate dusting of cinnamon.
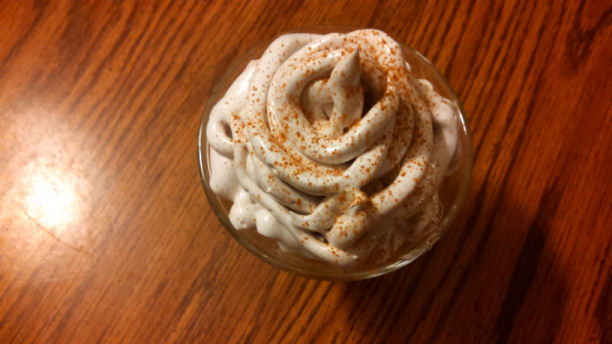
(I was pretty proud of that delicate dusting, insofar as it took a bit of creativity to pull off. See, my jar of cinnamon has quite large holes, which means that cinnamon really doesn’t come out of it in anything resembling a “dusting” so much as a “big sploosh.” So instead of using it directly or trying to sprinkle it by hand, I got the idea to pour a little cinnamon into a tea strainer and then shake that above each of the dessert cups. Boom, delicately dusted like a BOSS!)
Once they’d all been cinnamon-ified, they were ready to eat!

THE VERDICT
This may be the sweetest thing I’ve ever eaten in my life. Like, diabetic-coma-inducing sweet. Both components are very sweet foods on their own, and when you add them together, the result is almost overwhelming.
Which is not to say they’re not delicious, because they really are, but a little goes a long way! Those are not particularly large portions, but I found that I could only eat about half of one at a time; they’re just so very sweet and so very rich that you really don’t need a lot. (Of course, that’s just me – the family member with the biggest sweet tooth is pretty much in love with these and wants to eat them all the time.) I especially liked the port wine meringue – the wine flavor isn’t strong, but it’s just present enough to add a depth and richness to the meringue that’s really, really yummy. I can imagine adding the wine syrup to meringue in other dishes, too. (And I definitely did a lot of spoon-licking from the meringue bowl.)
I probably won’t make these again anytime soon, but only because I don’t have the patience to make desserts involving long periods of continuous stirring very often. I don’t think there’s much I’d change when and if I do make them again – perhaps I might try adding some additional twist of flavor to the manjar blanco – maybe a salted caramel version? That could be interesting!
THE INGREDIENTS
1 can evaporated milk
1 can sweetened condensed milk
3 eggs, separated
2 tsp vanilla
1 cup sugar
1/4 cup port wine
1/4 tsp cream of tartar
cinnamon for dusting
Stay tuned – I’ll draw the next country later tonight!
…yeah, I did it again.
At least this time I had the sense to realize that if I was going to prepare two different fairly complicated foods, it would be better to make them on two different days. So this time you don’t have to picture me as a movie star scrambling around trying to do too many things at once while still exuding glamour and refinement, but just as my ordinary, schlubby, thoroughly unrefined self doing one thing at a time. (I mean, you can still make me a movie star if you want. I won’t object or anything.)
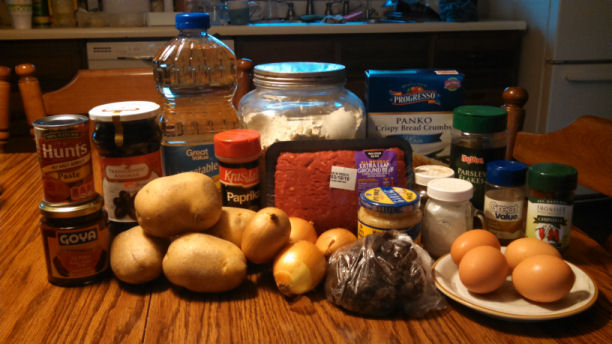
Once again, I ended up learning a fair bit about Peruvian culture and history by way of reading their recipes. (Did you know that Chinese-Peruvian fusion food is kind of a big thing due to thousands of Chinese laborers being brought to Peru as indentured servants in the 1800s? Because I didn’t!) And once again, I had a heck of a time narrowing down what I wanted to make, because too many things sounded delicious. Since I spent too much money on tuna last week, I was at least able to rule out recipes that involved a significant number of hard-to-find or potentially pricey ingredients, but that still left me with a dessert (which you’ll read about in the next post) and an appetizer/snack/meal thingie that sounded delightfully unhealthy and not too hard to make. That was papas rellenas – literally, “stuffed potatoes,” although the actual food is not exactly literal stuffed potatoes. Let’s get right to…
THE PROCESS
Hey, look, it’s ingredients!
The first step was to hard-boil two of those four eggs. Simple enough. Eggs were hard-boiled and then set aside, I gave the pot they’d boiled in a quick rinse, refilled it with water, added a sprinkle of salt, and then boiled that, too. In went the four potatoes, with their skins still on. After twenty minutes or so, I removed them, let them cool for a couple of minutes, and then played a very literal game of hot potato while I tried to peel the skins off as quickly as possible without burning myself too much. (I think next time I’d go ahead and let them cool a little bit longer.) Once each boiled potato was denuded, it went into a big bowl to be thoroughly mashed – at which point I discovered that I had one stubborn potato that was still hard and un-mashable in the middle, so it went back in the pot to boil some more. I took it out after a few minutes and tried again, managing to scrape off more soft potato before once again hitting a hard, un-mashable center. I ended up having to repeat this process three friggin’ times. So I guess the instructions for this step are “boil potatoes for 20 minutes, unless you have one potato that’s a jerk, in which case it apparently needs to be boiled for 37 minutes before it will behave itself and be mashed.”
Anyway, after that really excessive amount of boiling and reboiling, I got to smash the heck out of the misbehaving potato with a potato masher for a while, which was somewhat therapeutic. If you own a potato ricer, you could absolutely use it for this, although that’d probably be a less therapeutic way of dealing with obnoxious potatoes. Either way, the goal is to end up with a good-sized portion of smooth, un-lumpy mashed potatoes. Once the potatoes were well and truly mashed, I added a generous amount of salt and pepper, mashed that in well, and then stuck the bowl of potatoes into the fridge to get nice and cold. (I also separated out one blob of potatoes before adding the salt, so that I could make a reduced-sodium version of the papas rellenas for my sodium-restricted family member.)
While the potatoes were chilling, it was time to make the filling. (Hey, I’m a poet and I don’t even know it! Or, well, I guess I do know it, because otherwise I wouldn’t have been able to say that I’m a poet. Unless I were just lying about being a poet, in which case I could have said it and not known that it was actually true. But in that case, would I really be lying, since I’m making a true statement despite believing it to be untrue? What even is truth, when you come right down to it? Perhaps beauty is truth, truth beauty, and that is all ye know on earth and all ye need to know. Hey, I’m a poet and I don’t even…ANYWAY, BACK TO COOKING.)
The first step in making the filling was to chop my onions. I would normally have just used one big onion (and that’s what I’ll be listing in the ingredients), but I happened to have a bunch of little onions that needed using up, so I used several of them instead. Once I had a nice big pile of chopped onion, it went into the skillet to be sautéed with garlic and a little vegetable oil. (If there’s one thing I’ve learned from this project so far, it seems to be that no matter where you go in the world, everyone likes onion and garlic, especially sautéed onion and garlic. As well they should!) Once the onions were translucent, they were joined in the pan by the ground beef, spices, tomato paste, and aji panca paste. (The latter was my one unfamiliar ingredient this week – I thought it had a very similar flavor to chipotle pepper. Which I also used, because mmm, chipotle pepper.) I cooked that all over medium-high heat until the beef was nicely browned.
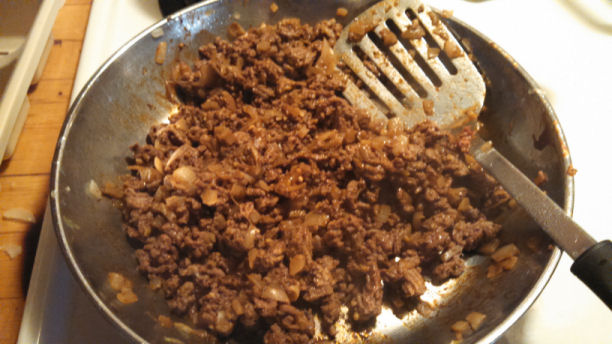
Once that was done, I removed the pan from the heat, chopped my two hard-boiled eggs and about 8-10 big olives (I went ahead and picked up actual Peruvian olives when I was buying the aji panca paste, but any sort of olives would probably work – Kalamata olives are pretty similar to the genuine Peruvian article, but I honestly think plain old canned green or black olives would be tasty in this recipe, too), and mixed both of them into the meat along with my raisins. (I was a little uncertain about the raisins – while I’ve made and loved authentic medieval mincemeat pies that mix together meat and dried fruits, it can be a bit of an acquired taste combination. I ended up being glad I put them in, though!)
At that point, I took a little break to make sure my mashed potatoes had plenty of time to get nice and cold (they’ll work better for the next step if they’re cold). Once I’d played a few games of Sudoku and the potatoes were good and chilly, I got out a medium-sized pot and poured the entire bottle of vegetable oil in it. That’s right – we’re deep-frying these suckers! Because we’re healthy like that! I stuck a candy thermometer on the side of the pan and started slowly heating the oil. (It took a little bit of experimenting, since different recipes said different things about the ideal frying temperature, but I thought the sweet spot was right around 350º Fahrenheit.) While that was warming up, I created my papas rellenas assembly line. I filled one bowl with flour, one with the two remaining eggs (which got a quick beating), and one with panko bread crumbs (and a few spoonfuls of flour in there, too).
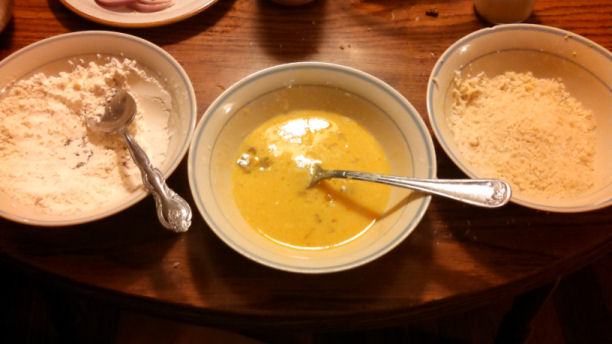
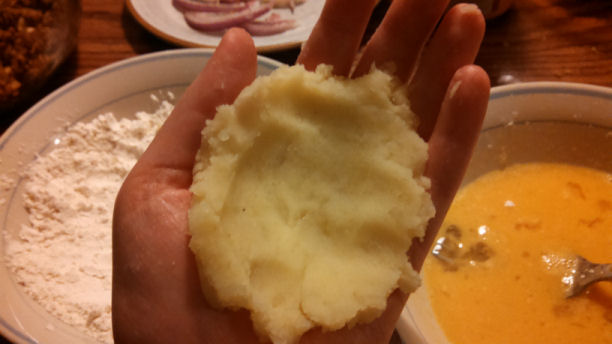
I then got my chilled mashed potatoes out of the fridge, set them up next to my assembly line along with the bowl of meat filling, and started assembling my fried potato goodies. The goal here is essentially to create new “potatoes” out of a mashed-potato exterior and a spiced-meat interior. So, first, I floured my hands a little, and then scooped up a blob of mashed potatoes, forming it into a sort of bowl in the palm of one hand.
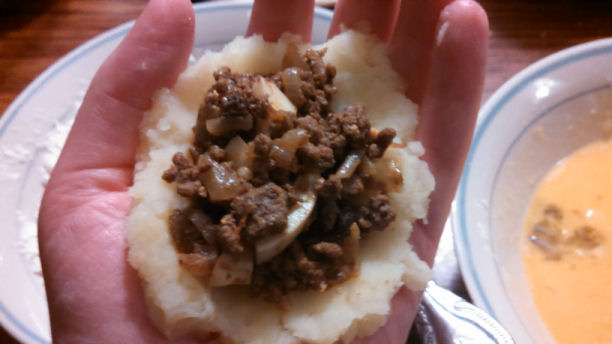
Then into that “bowl” went a scoop of filling…
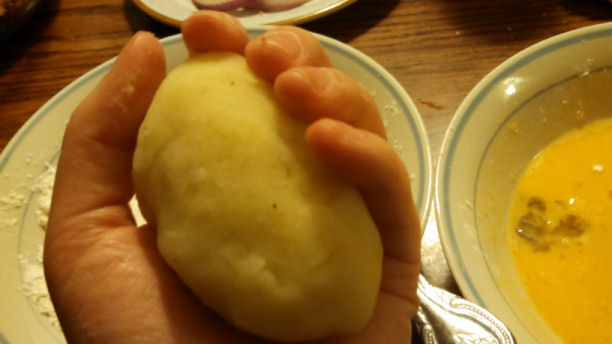
And then, over the top of that went another flattened-out blob of mashed potatoes. I sealed it shut with more mashed potato and shaped it until the result looked, well, like a potato.
At that point, the newly-formed “potato” was rolled in each of the pans in turn – first a coat of flour, then a coat of beaten eggs, and finally a coat of the panko mixture.
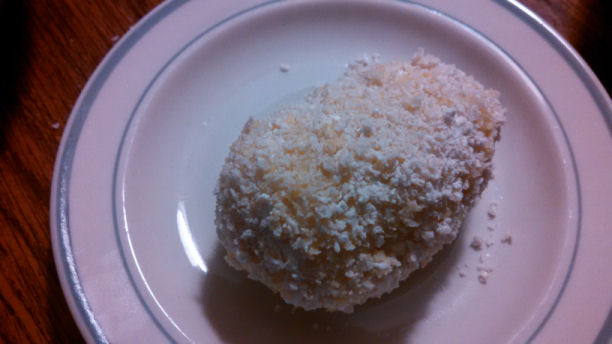
The “potato” was now ready to be fried. At 350º F, it took about three minutes in the hot oil to get it nicely golden brown on all sides. I repeated this process with each newly-formed potato; in the end, I had eight of them, plus one little miniature potato because I didn’t portion things out perfectly. (I also had a fair amount of filling left over, because I figured (correctly) that the filling would probably be reasonably tasty in its own right and because it’s easier to figure out the proper portions of spices with a pound of beef than with “probably somewhere around 3/5 of a pound, I dunno.”)

THE VERDICT
Tasty! I mean…it’s breaded, deep fried mashed potato filled with seasoned meat. That seems like a pretty challenging thing to make un-tasty. They tasted good plain, sprinkled with salt, or dunked in salsa, and I think they’d taste good with any number of other sauces or seasonings, too.
I actually thought of this dish as my biggest “failure” up to this point, but that word very much belongs in scare-quotes. You see, I liked them quite a bit, but I think they’re the first dish that I haven’t liked so very, very much that I ate them again as leftovers the day after I made them. (I did happily eat leftover papas rellenas for lunch two days after I made them, to be clear.) On the other hand, one of the people who has sampled several of these dishes said they were her favorite thing so far, so this is definitely a your-mileage-may-vary thing. And, y’know, if “I will gladly eat these several times in one week, just maybe not as back-to-back meals” is “failure,” then I think I’m doing pretty well, really.
If I make these again – which I probably will, despite their quote-unquote “failure” status, since everyone who ate them liked them – I might try adding some more seasonings besides salt and pepper to the potatoes themselves. I don’t think they needed any other seasoning, but I bet some garlic mixed in there and maybe a little more chipotle pepper would probably be pretty yummy.
THE INGEDIENTS
4 large yellow potatoes
2 eggs, hard-boiled
1 onion
2 tsp garlic, minced (or about 4 cloves)
1 lb ground beef
1 1/2 tbsp tomato paste
2 tsp aji panca paste
3/4 tsp cumin
1/4 tsp parsley
1/4 tsp chipotle pepper
pinch paprika
pinch pepper
salt to taste
1/4 cup raisins
8-10 olives, chopped
flour
2 eggs, beaten
panko crumbs
vegetable oil sufficient for frying
Stay tuned for part 2 – it’s going to be sweet. Very, very sweet…

So, as I mentioned in the last post, tropical fruits are abundant in the Seychelles, but none more so than bananas. Searching for Seychellois recipes, I found sweet banana recipes, savory banana recipes, banana curries, banana fritters, bananas flambéed in rum, bananas used to season fish and fish used to season bananas, and a snack rather delightfully named a “banana carrot.” (It doesn’t involve carrots; it’s just shaped like one. And it sounds pretty tasty!) The recipe I settled on, ladob banan, uses plantains as its banana variety of choice, and also features the other fruit that seemed nearly ubiquitous in Seychellois cuisine, the good ol’ coconut. Interestingly, ladob can be made as both a sweet or a savory dish – the savory version replaces the sugar with salt and the vanilla with pieces of fish. That sounded interesting, too, but I already had a fishy dish. I wanted dessert.
THE PROCESS
You know the drill by now:
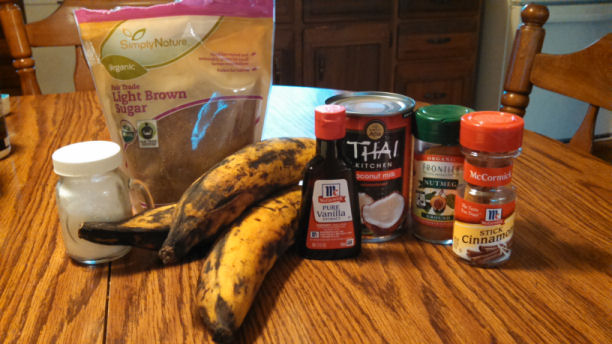
I was lucky enough to be able to find ripe plantains at the store, so that I didn’t have to wait days between purchasing them and cooking with them – often you’ll only be able to find green ones, which are great for savory plantain dishes, but for sweet things, you want plantains that have significant amounts of blackness on ’em. These plantains were just about perfect.
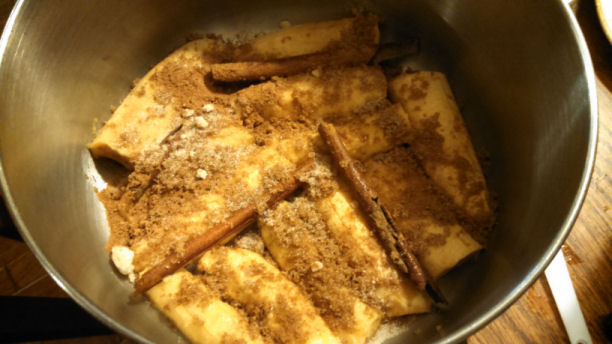
The first step was to peel the plantains and cut them into quarters (once lengthwise, and once the other way, so that I ended up with long chunks of plantain with one flat side). Plantains don’t peel as easily as bananas, so a couple of times I had to take my knife and slice pieces of the peel off, but after a minute or two, I had twelve nice plantain pieces. I arranged those, flat side down, on the bottom of a big cooking pot (it took some plantain-wrangling, because there was just baaaaaaarely room for all of them), wedged some cinnamon sticks in between them, and then covered them with the brown sugar, nutmeg, and just a tiny dash of salt.
At this point, the pot got to sit for a while because I was busy with rice and curry, but once I knew the curry was almost done, I poured in the vanilla and the coconut milk, and then put the pot on the stove at medium-high heat and brought the liquid up to a boil.
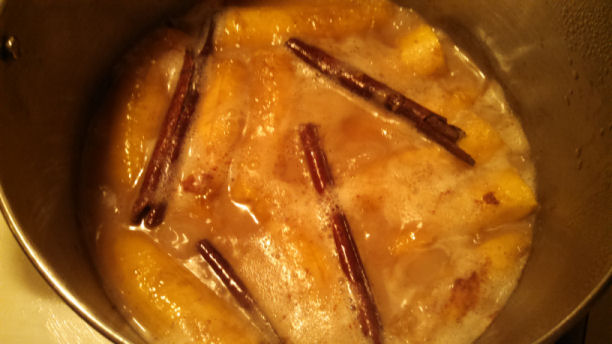
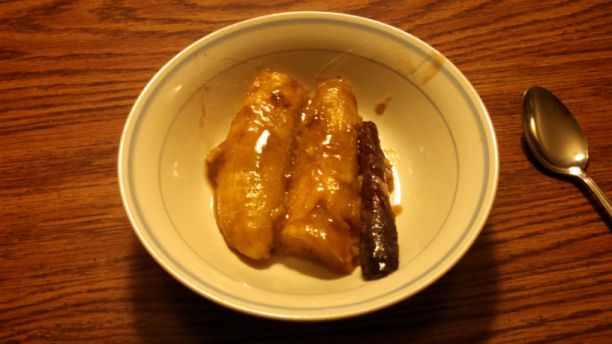
Once it had maintained a good, solid boil for about ten minutes, I turned the heat down to medium-low (on my stove with the 1-10 number dial, I set it at about a 3), and let it gently cook for another half hour or so while we ate curry and rice. By the time we’d finished eating, the liquid had almost all been absorbed or evaporated so that what was left behind were tender plantains in a very thick, gooey coconut-and-brown-sugar sauce. They were ready to eat.
THE VERDICT
Scrumptious! I really loved this. I was a little worried that cooking the plantains for so long in all that coconut milk was going to make them turn out too soggy and squishy, but they held up beautifully while still soaking up tons of flavor from the other ingredients.
I’m not even going to say “if” I make this again, because not only will I make this again, I’m probably going to make it again within the next day or two, because I got a good deal on plantains and bought three more of them already. When I make this again, in a day or two, I won’t change a thing. It’s great – and as desserts go, it’s even relatively healthy. I suspect that not only will I make ladob banan again this week, it will probably end up in the rotation of “desserts I make on a regular basis for the rest of my life,” because it’s very easy, very tasty, and just different enough to be an interesting treat to whip out for guests.
THE INGREDIENTS
3 ripe plantains
4 tbsp brown sugar
4 cinnamon sticks
1 tsp nutmeg
dash of salt
2 tsp vanilla extract
1 can (13.5 oz) of coconut milk
(Since I’m running waaaaaaaaaaaaay behind schedule on writing up these posts, country #7 should appear about two minutes after this post does.)
I swear, I really did intend this project to be about making one recipe per week. As I’ve mentioned on the “about” pages, I am neither well off financially nor physically, and so one exciting new dish per week was a nice, realistic, affordable goal. The trouble is, I keep drawing countries that have really, really tasty-sounding cuisine. Darn you, delicious countries!
So, yeah, I made an entire meal – entree, side, and dessert – this time. Because I am crazy. This was also by far the most expensive week I’ve had ingredient-wise, although roughly 90% of that was just due to one ingredient. As it turns out, acquiring tuna steaks when you live several hundred miles from the nearest ocean is somewhat challenging. The first couple of grocery stores I visited didn’t sell any non-canned tuna at all, and when I did finally find it, the price was…not great. If I hadn’t already bought all the other ingredients for my elaborate Seychellois feast, I probably would have reconsidered making the curry at all. But I’d set my heart on tuna curry, and tuna curry I would have. I guess I’ll just eat a lot of ramen for lunch this month (and, hopefully, find cheaper things to cook in the next few weeks).
Using some sort of fish seemed fairly necessary if I wanted an authentic Seychellois experience, though, because Seychelles consists of a smattering of tiny islands located even farther from the African mainland than I am from an ocean, and while they do eat some other meats there (mostly chicken), fish is, for obvious reasons, their staple protein. Aside from fish, the other major staple of Seychellois cuisine is tropical fruit, especially coconuts and bananas. Accordingly, in the spirit of the why-not-both girl, I used all three. (Well, I used what we in America typically call plantains, but plantains are just a type of banana in the same way that Granny Smiths are a type of apple, and most of the world, including the Seychelles, appears to refer to them accordingly. Which makes sense, since according to various sources, there are anywhere from 17 to 27 varieties of banana grown in the Seychelles. Under the circumstances, treating each one as a different fruit rather than just one of the 27 available banana options would seem rather silly. Anyway, enough about plantains for now – they’ll be in the next post.)
Since I was making a complete meal, I prepared all three of my dishes at the same time, metaphorically (and, occasionally, almost physically) juggling plates in order to get everything done at the proper times relative to each other. But since I don’t think 87 variations on “and then I switched back to working on the curry while the rice was cooking” (and a dozen or so variations on “and then I almost put the wrong amount of cumin in the rice because I was looking at the curry recipe by mistake”) would make for very compelling reading, I’m going to write up the three portions of the meal separately, and you can just imagine me frantically running around the kitchen trying to make sure nothing was getting burnt or missing vital ingredients in between basically all the steps. (Also, as long as you’re imagining, please imagine me being played by, say, Scarlett Johannson, because I bet she’d make running around in stained plaid pajamas trying not to burn her curry look much more elegant. She probably wears $10,000 couture stained plaid pajamas.) I’ll discuss the tuna and rice in this post, and then finish things up (appropriately enough) with dessert in Part 2. Let’s start with the tuna.
THE PROCESS
As usual, I began by photographing my ingredients.
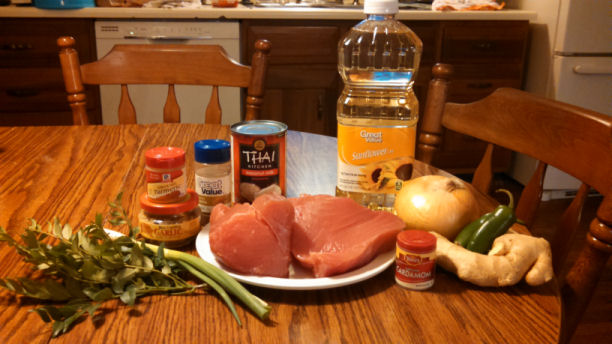
“Kari koko,” in case you hadn’t guessed by now, is Seychellois Creole for “coconut curry.” Luckily for me, after all the “fun” I had trying to open a coconut for my Honduran recipe a few weeks ago, this time around, I only needed coconut milk. (I actually ended up needing a little more than one can’s worth, but I’m not counting the second can as an ingredient missing from the picture, since two cans of coconut milk look a lot like one can of coconut milk, just, y’know, two-ier.)
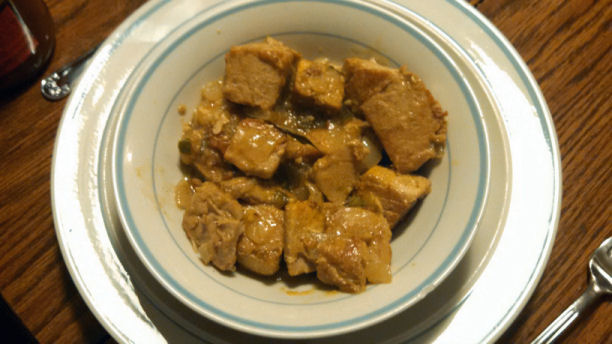
First I sliced up my pile of expensive tuna steaks into roughly 1-inch cubes. I coated the bottom of my biggest skillet with sunflower oil, put it on medium heat, and began pouring tuna cubes into the pan – at which point I discovered that even with my biggest skillet, there was no way three pounds of tuna cubes were going to fit in there at once if I wanted to have any room left over for stirring and flipping them. Not even close. Either people have really big skillets in the Seychelles, or the recipes I’d read had just kind of glossed over that part. Oh, well. I divided the tuna into three piles and started frying it up.
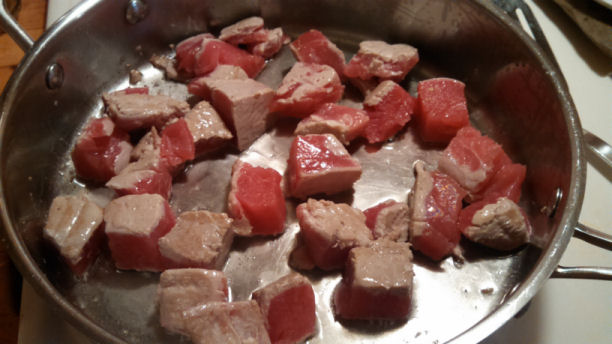
Because the goal was to have tuna that was (a) cooked through and (b) not burnt to a crisp on the outside, the heat needed to be relatively low, and so frying the tuna was a slow, slow process, especially since I had to do it three separate times. At several points, I thought I was done, only to cut a tuna cube open and discover a patch of bright, uncooked red in the middle. Seared tuna is delicious, but that wasn’t the goal here, so I’d simply shake my fist and yell, “TUNAAAAAAAAAAAA” like William Shatner yelling, “KHAAAAAAAAAAAAAAN” and keep on frying. It took a while, but eventually I had three plates full of fully cooked tuna cubes. I set them aside, gave the skillet a quick wash to get rid of stray burnt-tuna bits, and set to work on the vegetables.
I chopped up an onion, grated some fresh ginger, and seeded and diced my chili peppers. Now, if I were being properly authentic about things, this recipe would have contained several little, hot chili peppers, such as bird’s eye chilis. However, as I may have mentioned before, one of the people I’m generally feeding really does not like spicy food. I do, but I try to be nice about this sort of thing, so in place of bird’s eyes, I used jalapeños. Even that, however, was probably going to be too hot for the heat-hater in the house. So once I’d chopped all the veggies, about 3/4 of the onion, ginger, and minced garlic went into the big skillet (along with another splash of sunflower oil) and 1/4 of those things went into a separate small skillet, while the proportions of the diced pepper were reversed – so that once the rest of the ingredients were added, I’d have a big pan of very mild curry (but still with at least a little heat), and a smaller pan of hopefully-not-too-mild curry.
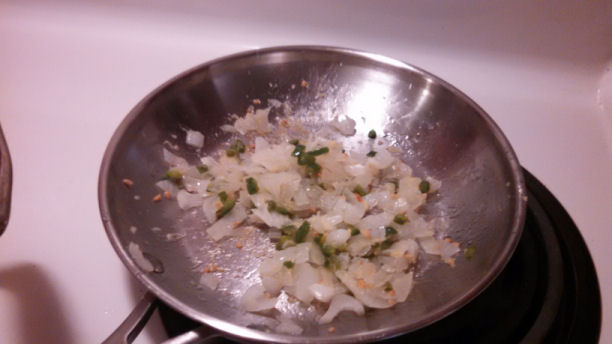
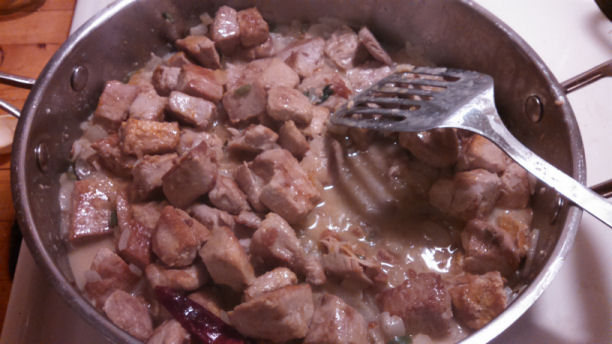
I cooked the veggies just enough to get the onions soft and translucent, and then I mixed together the coconut milk, cumin, cardamom, turmeric, and black pepper in a bowl and poured it into the two pans in that same 3/4ish-1/4ish proportion. (Obviously, if you’re doing everything in one pan, there’s no particularly good reason to bother mixing things in a bowl first.) I heated that up a bit, and then the tuna, curry leaves, and lemongrass paste went in.
(You may possibly have noticed that I haven’t mentioned putting in any salt. One of the people I’ll be feeding pretty often is on a reduced-sodium diet, so if I’m making something where the salt can reasonably be added to people’s individual portions when they eat it, I will usually do it that way. If you’re not feeding anyone who needs to watch their sodium intake, you could add a pinch of salt when you put in the other herbs and spices.)
At this point, I did a quick taste test of both pans of curry, and determined that the mild version was so mild that the spice level barely even counted as “mild” rather than “nonexistent,” so I went ahead and tossed a couple of the dried chilies left over from week #4 in there to give it at least a touch more heat. I threw a couple of them in the less-mild pan as well, because I was in a spicy sort of mood. (I’m not listing dried chilis as an ingredient at the end of this post, though, because if you want more heat, you’re probably not going to be using fractional amounts of jalapeño instead of hotter peppers in the first place.) Then I brought the liquid back up to a simmer, covered the pans, lowered the heat, and waited 10-15 minutes. After that, all that was left was to uncover both pans and let the sauce thicken a little more, and then the curry was ready to eat. (Okay, really all that was left was to reheat the rice a bit since it got done before the curry did, put the dessert on the stove so it’d be ready around the time we finished dinner, and, of course, clear a bunch of cooking debris off the table so I could take pictures of my food without it looking like one of the smaller islands of the Seychelles exploded in my kitchen and got coconut milk dribbles and onion skins everywhere, but as we’ve established, you only get to count those steps if you also make me look like a movie star in fancy pajamas.)
THE VERDICT
Yummy! I still wish I’d made it spicier, though – the coconut milk doesn’t impart a lot of flavor so much as just a general sense of richness, but it does act to “cool down” the dish enough that I think I could have gotten away with adding more and hotter peppers, especially in my not-so-mild portion. I’ll go into a bit more detail about how the curry tasted and what I’d like to change once I tell you about the rice, since they’re really meant to go together. For now, let’s just skip straight to…
THE INGREDIENTS
3 lbs fresh tuna steaks, chopped into roughly 1-inch cubes
sunflower oil sufficient for frying all the things that need frying
1 onion, diced
3 cloves of garlic, minced
1 tbsp freshly-grated ginger
2 jalapeños, seeded and diced (use hotter peppers if you like heat!)
1 tsp ground cumin
1/2 tsp ground cardamom
1/2 tsp turmeric
pinch of black pepper
salt to taste
1-2 cans coconut milk
2 tsp lemongrass paste
10 curry leaves
chopped scallion to garnish (if you’re not a space cadet)
Okay, on to the Creole rice.
THE PROCESS
This is a fairly simple recipe, although it uses a lot of ingredients:
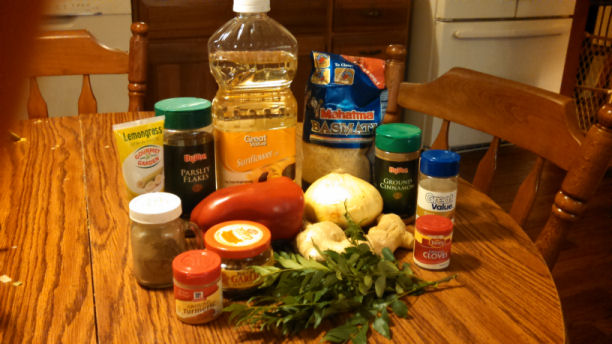
Pretty much all there is to do here is cook rice, chop veggies, sauté veggies, and mix everything into the cooked rice. So, therefore, I cooked the rice, chopped up an onion and part of that bell pepper (because that pepper is remarkably large, I only used something like a third of it or maybe even a little less, but I’m going to say “half a red bell pepper” in the ingredients list, since I think that’d be about the right amount of a more typical pepper), and then went to grate some more ginger.
You know how I said a minute ago that I’m impressively idiotic? So, I just recently bought a new grater, and grating the ginger for the rice and curry was my first chance to try it out. It worked really well, and I was very pleased with it. As I went to grate this second portion of ginger, a family member walked into the kitchen, and I happily said, “Look how well my new grater works!”
Guess what happened immediately after I said that. Just guess.

This makes two weeks in a row that I’ve managed to injure my hand in very stupid ways while cooking dishes for this project. At this rate, I think I’d better choose a dish that doesn’t involve chopping anything next week unless I want to lose a finger or two.
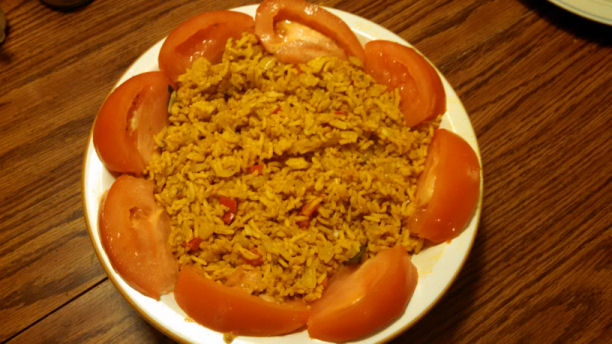
Anyway, once I threw out the bloody ginger and washed and bandaged my hand, I grated some new, non-bloody ginger without further incident. (And the grater really did work well!) Once the ginger was grated, I sautéed it in sunflower oil along with the onion, garlic, bell pepper, and curry leaves until all of them were nice and soft and a little caramelized. Then it was just a matter of dumping all of the veggies and all the other ingredients into the cooked rice and mixing it up well. Again, as with the curry, I did not include any salt, since it was easily salted on people’s plates. Once everything was mixed in (and the whole thing was reheated a bit since I had to wait for the curry to finish cooking), I poured the seasoned rice into a serving bowl and sliced a tomato to use as a tasty garnish.
THE VERDICT
Also yummy! I do think the rice needed a little bit of salt, more so than the curry did, but adding it on my plate worked just fine.
Both the curry and the rice are capable of standing alone as foods unto themselves, and both of them are perfectly tasty that way, but I intended them to be eaten together, and the combination of the two is definitely greater than the sum of its parts. The similar-but-different flavors of each of the dishes work together extremely well. I also really liked the tomato slices with both the curry and the rice. The whole shebang made for a wonderful meal and possibly even more wonderful leftovers – I’ve been very happily chowing down on bowls of curry and rice for lunch for the last few days, and, like curries often do, it seems to get even more flavorful (and spicier, which I approve of) as time goes on. I’ve also tried it with a little mango chutney added, and it was super good that way, too.
I don’t think I’d change anything about the rice, but if I make the curry again, there is one more thing besides adding more heat that I almost certainly would do differently. Instead of the “chicken of the sea,” I think I’d just use, well, the chicken of the land. Don’t get me wrong – the tuna was great, I’m glad I made it, and I liked it very much, but I honestly think the same recipe would still work very well with plain old chicken, and it’d cost me a whole heck of a lot less. So I probably won’t be making Seychellois tuna kari koko and Creole rice again, but Seychellois chicken kari koko and Creole rice? Absolutely.
THE INGREDIENTS
1 1/3 cups uncooked basmati rice (makes 4 cups cooked)
2 tbsp sunflower oil (or enough to saute all your veggies)
1 onion, diced
1/2 a red bell pepper, diced
2 tsp freshly grated ginger
2-3 cloves of garlic, minced
1 1/2 tbsp turmeric
1 tbsp lemongrass paste
1/2 tsp parsley
1/2 tsp cinnamon
1/2 tsp cumin
1/4 tsp cloves
pinch of black pepper
salt to taste
sliced tomato for garnish
Stay tuned for dessert in Part 2 – it’s going to be a tasty one!
